Friday 27 October 2017

Blossum, Bloom, Grow

I love playing with new products and this last week I got to play with a relatively new product from Faber-Castell, colour fizz tablets. They are included in the Shop and Crop Scrapbooking September Mixed Media Mania Kit, which is still available in the shop.


If you would like to see how I created this canvas and used the colour fizz tablets then please pop on over to the Shop and Crop Scrapbooking Blog to follow along with my tutorial.

Happy Creating

Monday 2 October 2017

Only By The Walls

It is the beginning of the month which means another art journal challenge from Art and Soul Studio has started. You will find all the details for the challenge in the facebook group Soul Sisters which is part of the Art and Soul Studio.

The challenge is to use these images and quote for inspiration to create an art journal page.

Here is an close up of a part of my journal page if you would like to see the whole piece please follow this link to the Art and Soul Studio Blog.

Products from the shop: Tim Holtz Distress Ink: walnut stain, vintage photo and peeled paint

Happy Creating

Sunday 24 September 2017

Paperfic Melbourne 2017

I cannot remember the last time I attended the Paperific Expo, it is at least 13 years as I have know my husband that long and I haven't been since I have know him. Last month I was able to go, but it was a little different to what I would normally have done. Normally I would have picked a day, and gone, this time was there for four days and working. Thursday was set up day, got there around 1130 as I had to go after I had dropped my children at school. I was really excited but also nervous as I was meeting Kylie and Darryl Powell who own and run Shop and Crop Scrapbooking. I had spoken to Kylie on the phone and had conversations on facebook and messenger but never actually in person. Its a bit hard when I live in Victoria and she lives in NSW. I also meet the fabulous Donna who is also on the design team.

The weekend was a fantastic, I had an absolute blast. For the weekend I got to talk and meet lots of people, selling products that I love and on the Saturday and Sunday I got messy. I played with Expo Kit No. 4 instead of making a scrapbooking layout I create a canvas. Here is a sneak peak, if you would like to see the complete piece please pop on over to the Blog.


Happy Creating

Sunday 10 September 2017

Using Leftovers From A Kit

When we buy a kit there is always leftovers, do you leave them sitting on your desk or in a cupboard because you are not sure what to do with them?
 
Recently I got to work with a gorgeous kit from Shop and Crop Scrapbooking. With this kit I created a mixed media canvas, click here to see my tutorial on how I created it.


I had so much chipboard and cardstock leftover that I needed to create some more with it. I still have plenty left over after I created a couple of cards, below are a couple of close ups to see the whole cards and tutorial please visit the Shop and Crop Scrapbooking Blog.


Happy Creating

Thursday 17 August 2017

Day Dream

Just recently I had the pleasure of creating with a Shop and Crop Scrapbooking Kit that was created for the Brisbane Expo by the amazingly talent Elisa.

This is what Elisa designed for the Expo Kit - No. 8  instructions are included for this gorgeous layout.
 
The kit is jammed packed with lots of goodies to play with. Here is what I designed with the kit. I still have lots of left overs so I look forward to playing and sharing with you again in a couple of weeks.
 
If you would like to see the whole canvas and the steps on how to create it please follow the link to the Shop and Crop Scrapbooking Blog.
 
Happy Creating


Saturday 12 August 2017

Out of the Darkness

This past week was not a great week, and when creating art whether its intentional or not your emotions do come through. Today was my turn up on the Art and Soul Blog and I created a very dark journal page.


If you would like to know how I created this page and the products I used please follow the link above to the Art and Soul Studio blog.

Happy Creating

Sunday 30 July 2017

Stitching

Ever since I can remember I have been doing something creative whether it be mixed media, making cards, cross stitch, painting or drawing. Today's prompt for the Artsy Circles is stitching. So I combined my past love of making crosses with my current love of making mixed media and produced my Artsy Circle for the facebook group Soul Sisters.


I started out with my gesso covered circle. I prepared 6 circles, really should get some more cut and prepared because I am having so much fun.

The next step was using my stencil to create the circles. Once the texture paste dried I then stitched the crosses. I only had two size needles at hand, one was a tiny cotton needle and the other was a tapestry needle. The tiny needle was just too small and the stitching would have not really shown up. The tapestry needle really was too big but I decided to use it any way. I was really disappointed with the holes that it left but as you can see they don't show up on the final piece its just more texture.

Next I added my colour

My final layer for the circle was the gesso, I originally applied it with a palette knife but before it was dried I wiped it away. To apply the gesso I used my fingers.

products that can be found at Art and Soul Studio are listed below
marabu art spray - red orange and lemons

Happy Creating

Thursday 27 July 2017

Choose To Shine

I am really enjoying creating the Artsy Circles, I think I am stepping out of my comfort zone, still no idea what my style is but that's ok, I don't need to know.

So the prompt for today is Butterflies. I love butterflies, along with tulips they are my most favourite things. In saying that you would not believe the trouble I had creating the circle for today. First I was looking for something that I thought I had thrown out and in the end I had just transferred it to another draw, 1/2 an hour I spent looking and then it wasn't right. Secondly, after I realise that what I thought was a good idea and it wasn't I then spent ages going through all my stamps and stencils to find what I did have.

Finally I created a circle that I am really, really happy with.


I started off with a piece of heavy water colour paper that I put through my bigshot with a circle die that has a diameter of 10.4 cm, which I then put gesso on both sides.

For my background colour I mixed clear gesso with Frank Garcia artisan powder and applied it with my palate knife, making sure that I had texture and not just an all over colour.

Making sure that the gesso layer was dry with my archival ink and stamp I added another layer.

It is all about layers, through a stencil I added some paint in a contrasting colour.

Next I added white gesso to just tie it altogether, then I got out my stabilo all pencil to grunge it up.


Ok so this is where I forgot to take photos as I was very involved in my creative process. Once I made it grungy, I then stamped the butterflies all over the surface making sure that they were going in different directions and that I had some flying off the page and flying on to the page. I then scraped another light layer of white gesso over my stamping. Using my stabilo all to grunge it up some more. Finally I added my white circle, embossed the image, used my stabilo all to grunge it up again. Lastly I added the three quotes.


products found at Art and Soul Studio
archival ink - jet black
art alchemy acrylic paint - black berry
Frank Garcia - artisan powder - french sage
kaisercraft stamp - sketchy

Happy Creating

Tuesday 25 July 2017

Dreamer of Dreams

Are you a member of the facebook group Soul Sisters? It is affiliated with the shop Art and Soul Studio. The reason I ask this question is that not only is it a wonderfully supportive group but they also have twice weekly prompts to get you creating. The prompts are for a project called Artsy Circles, using the prompt you can create anything that you like as long as the substrate is a circle.

A couple of weeks back the prompt was stencil. I used two, one from The Crafters Workshop - Mini Cubist and another from Scrap Fx - Day Dreamer. I love stencils, for me it is an addiction, that I just cant get over.


In my stash I had some gelli prints that I had done a little while ago. This is what I decided to use as my background. I attached the circle to my print with matte medium.

 Once I decide which way I liked the texture of my gelli print I then used my tcw stencil and dina wakley paint to add some colour.

I used versamark ink through my Scrap Fx Stencil so that I could emboss the image. I was so cross with myself as I used some tape to hold down my circle so it didn't move but then I went and ripped the print in two places when I removed the tape. I decided not cover them up, it just adds to the journey the Artsy Circle took me on

Here is a close of the embossed image.
 
The final step was to attach the words and add a little colour.
 
Products that can be found in the Art and Soul Studio shop are listed below
dina wakley media heavy body acrylic paint - umber, turquoise, tangerine and ocean
tim holtz idea-ology - metallic stickers
 
Happy Creating


Monday 24 July 2017

Once Upon A Time - Echo Park

For Shop and Crop Scrapbooking this week I got to play with the girly collection Once Upon A Time from Echo Park.

This was a really hard collection to use as I hadn't used something like this before. It had lots of yummy papers but also a huge range of stickers and chipboard accents. I really had to think about what I wanted to create. In the end I create a photo frame and a set of three cards.

Below you will find close ups of one of the cards and the frame. If you would like to see them in their entirety and the other two cards please pop on over the Shop and Crop Scrapbooking blog.


Happy Creating

Saturday 15 July 2017

You Have To Believe

Lately I have been struggling with my inner art demons, they are telling me that what I create is not good enough. They are telling me that I should give up and choose another hobby. Sometimes it is hard not listen to them when they are very, very loud. Most times I am able to turn then off, but lately it's been rather difficult. This morning I put them back in their sound proof box and proved to them and me I am good enough. I think I created one of my favourite pieces that I have ever made. It is an art journal page that I created for Art and Soul Studio.

Here are some close ups, if you would like to see the entire page and my process please follow the link to the blog.


Happy Creating

Tuesday 11 July 2017

Marabu - Acrylic Spray

I think I may have found a new product to love, the Marabu Art Spray. They are quick drying and waterproof. A lot of the sprays currently on the market are not waterproof so when you add water to the substrate they will reactivate, but not these.

Below are some photos of a play session that I had fun with. To see the full set of photos please pop on over the Art and Soul Studio Blog.


The colours I used are aquamarine, bordeaux, and aubergine and are available in the shop where you can find all 25 colours.

Happy Creating

Monday 10 July 2017

They Know The Way

Good Morning,
 
Have you seen the challenge that Shop and Crop Scrapbooking have running? If not here is a link to the post on the blog, where you will find lots of inspiration from the Design Team. To enter you need to belong to our Facebook group and add your creation into the correct album. You have until the end of the month to do so.
 
The challenge is a mood board
 
 
How much fun can you have with this, we would love to see what you create.
 
I took my inspiration from the colour palette and the quote and created a journal page. Here are some close up of the texture I was able to create. If you would like to see my process then please pop on over to Shop and Crop Scrapbooking Blog (see link above).


products used that can be found in the shop:
 
I hope that you play along
Happy Creating
 

Sunday 9 July 2017

Book Pages

It's Artsy Circle day today which means the Art and Soul Studio and the affiliated facebook group Soul Sisters have a new prompt.

The prompt for today is book pages. Now I know this can cause some people to shudder when they think about people ripping a book and if this is you please still play along but find a piece of cardstock that looks like a book page. I have an old text book that is filled with Shakespeare's plays that I brought from an op shop for $5, I am sure it will last me a life time.


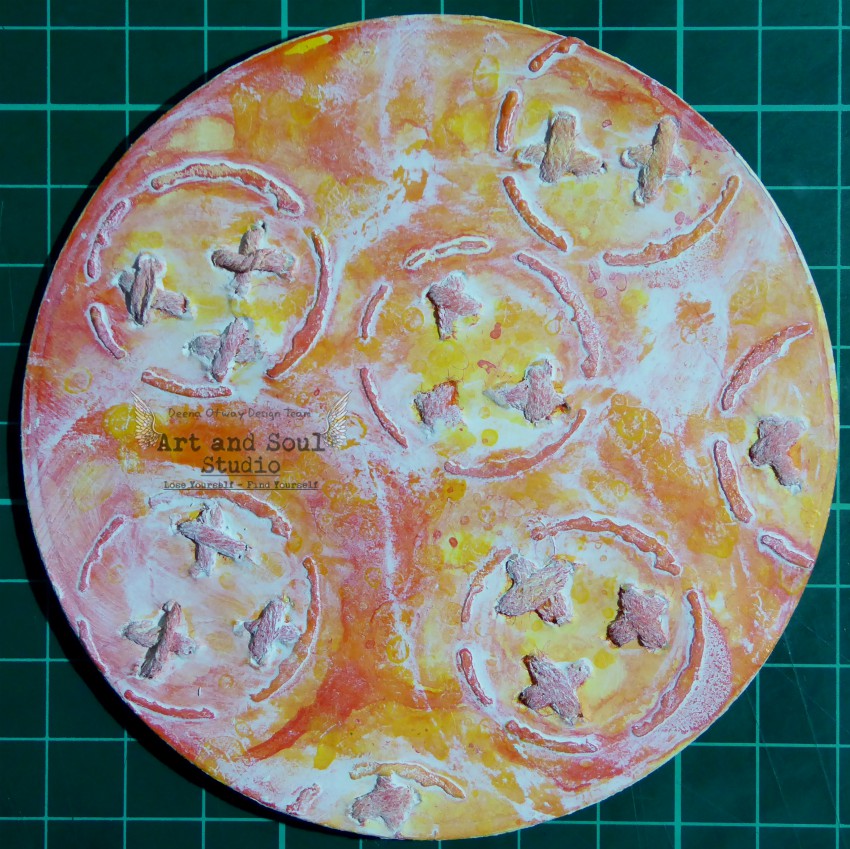
I started with a piece of heavy watercolour paper that I cut with my metal circle die through my bigshot. The circle is 10.3cm in diameter which I have then put gesso on both sides.

I decided that I was going to cover the surface of my paper with the book page, at first I was going to run it through my bigshot but I vetoed that idea. I put glue on my watercolour paper and then put it straight down onto the book page. Once dry, well what I thought was dry I torn the rest of the page away from the edge of the circle. To make sure that the paper was well attached I used my brayer over the top and bottom.

I let it sit overnight because I had no idea where I was going with this. I thought about drawing on it and actually went ahead and started, that was a complete disaster. I tried to erase my light pencil marks but I torn the page. Once the page was torn I could actually remove the book page from the watercolour paper. The glue wasn't dry, I don't know if this was because I used a glue stick on gesso. So my background on my actual complete circle is different from this picture because I put a new piece book paper down. This time attaching it with matte medium. Using a paint brush I put the matte medium on to my circle then the circle straight on to my book page.

I wanted a garden on my book page. Why you ask? I have no idea its just what I wanted. Looking through my large stash of stamp I found one that I like and knew would work for the idea I had in my head. When stamping I didn't want a dark or perfect image, so I had sure that I stamped on a scrap piece of paper first. Also I had never used this particular stamp from the set so I seasoned it with my ink first.

Once I found the stamp I was going to use I knew that I had some rub-ons that went with this stamp and that is what I used for the middle flower image and dragonfly.

I am not really sure where I was going with the gesso but I went with the flow and ended up with a smaller image but you could still see some of the image underneath.

Using my inktense pencils I coloured my image but I wanted the middle flower to stand out from the rest. I didn't want to use gesso so I was at first a little bit stumped but then I had a brain wave of using my artisan powders from Prima to dull the image. I painted the powder over all of my circle and once I was happy with the colour I then recoloured the middle flower. I also used another colour of my artisan powders on the gesso. I like these powders as they have no shimmer. I didn't put them on very heavy so they are really hard to see but they are there.

products used that can be found in the shop
Prima Artisan Powder - vintage ivory and trianon patina
Derwent Inktense Pencils - beach green, burnt orange, deep violet and deep rose

Happy Creating

Thursday 6 July 2017

Don't Follow The Direction Of The Arrows

It's Thursday today which means the second prompt for the Artsy Circles for Art and Soul Studio's facebook group Soul Sisters is out.

The prompt is arrows. Here is what I created


Using my metal die and bigshot I found the biggest circle, which is 10.3 cm in diameter and cut a piece of heavy watercolour paper. I then put gesso on both sides, this was to help stop the curling of the paper.

To create the background I did it in layers using three different distress stains. I didn't want to put the colour directly on to the circle so I splatted the stains onto my craft mat then sprayed them gentle with water. Once the stains beaded on my mat I dragged and laid my circle into the stain. I did this a number of times with each colour making sure that I dried in between the layers.

Using same three colours I then splattered the colours on top of the background again drying in between the layers.

I loved the background that I created but I needed more and in the end I lost some of the splatters of the stains but that's ok because their are no rules and creating in an adventure. At this stage I needed to add some arrows so with my white pen and arrow stencil I drew the shapes of the different arrows across the surface of my circle.

Being that the prompt was arrows I decided that this was just not enough so before I added my words to the circle with the same white pen I coloured in the arrows to make them stand out.

products used that can be found in the Art and Soul Store:
tim holtz distress stain - spiced marmalade, vintage photo and ripe persimmon

Happy Creating